1. Getting started
1.1. Installing your doc directory
You may already have sphinx sphinx installed – you can check by doing:
python -c 'import sphinx'
If that fails grab the latest version of and install it with:
> sudo easy_install -U Sphinx
Now you are ready to build a template for your docs, using sphinx-quickstart:
> sphinx-quickstart
accepting most of the defaults. I choose “sampledoc” as the name of my project. cd into your new directory and check the contents:
home:~/tmp/sampledoc> ls
Makefile      _static         conf.py
build         _templates      index.rst
The index.rst is the master ReST for your project, but before adding anything, let’s see if we can build some html:
make html
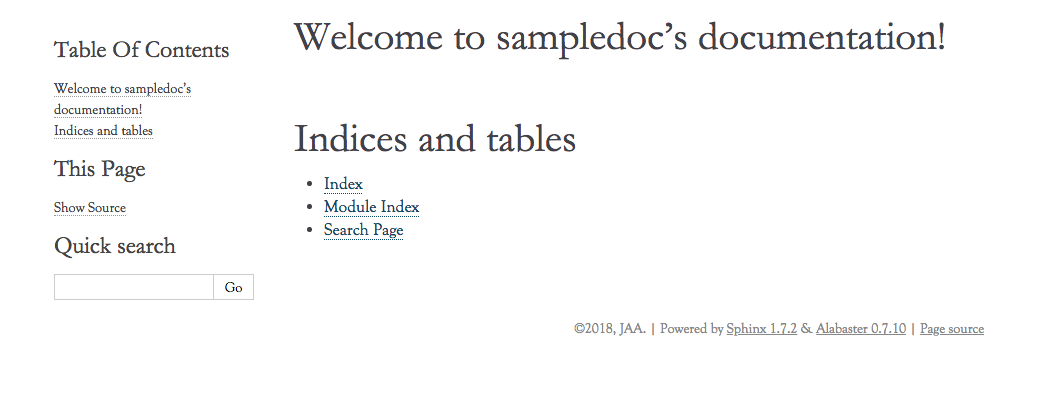
If you now point your browser to build/html/index.html, you
should see a basic sphinx site.

1.1.1. Fetching the data
Now we will start to customize out docs. Grab a couple of files from
the web site
or git. You will need getting_started.rst and
images/basic_screenshot.png. All of the files live in the
“completed” version of this tutorial, but since this is a tutorial,
we’ll just grab them one at a time, so you can learn what needs to be
changed where. Since we have more files to come, I’m going to grab
the whole git directory and just copy the files I need over for now.
First, I’ll cd up back into the directory containing my project, check
out the “finished” product from git, and then copy in just the files I
need into my sampledoc directory:
home:~/tmp/sampledoc> pwd
/Users/jdhunter/tmp/sampledoc
home:~/tmp/sampledoc> cd ..
home:~/tmp> git clone https://github.com/matplotlib/sampledoc.git tutorial
Cloning into 'tutorial'...
remote: Counting objects: 87, done.
remote: Compressing objects: 100% (43/43), done.
remote: Total 87 (delta 45), reused 83 (delta 41)
Unpacking objects: 100% (87/87), done.
Checking connectivity... done
home:~/tmp> cp tutorial/getting_started.rst sampledoc/
home:~/tmp> cp tutorial/_static/images/basic_screenshot.png sampledoc/_static/
The last step is to modify index.rst to include the
getting_started.rst file (be careful with the indentation, the
“g” in “getting_started” should line up with the ‘:’ in :maxdepth:
Contents:

.. toctree::
   :maxdepth: 2

   getting_started.rst
and then rebuild the docs:
cd sampledoc
make html
When you reload the page by refreshing your browser pointing to
build/html/index.html, you should see a link to the
“Getting Started” docs, and in there this page with the screenshot.
Voila!
We can also use the image directive in index.rst to include to the screenshot above
with:
.. image::
   images/basic_screenshot.png
Next we’ll customize the look and feel of our site to give it a logo, some custom css, and update the navigation panels to look more like the sphinx site itself – see custom_look.